
Understandably, not every backpacking tourist and camper has the opportunity to brew their coffee on a coffee farm with industrial-grade equipment. Most tourist sites will lack even one coffee tree, let alone an entire coffee farm. But this doesn’t mean you can’t brew a flavor-rich cup of coffee while camping. Camping coffee may seem complicated to brew because you’ll be working in a limited space with few resources. However, with the right tools and proper process, you can have a cup of crisp coffee in your hands in five minutes or less.
Most coffee drinking enthusiasts look down on instant coffee because it has less caffeine and a less intense coffee flavor than brewed coffee. But the humble instant coffee’s superpower is in its convenience. Instant coffee is faster to make, cheaper to obtain, and produces less waste than grounds coffee. Furthermore, health experts confirm instant coffee offers nearly all the benefits of grounds coffee.
Instant coffee is a great choice for campers with many places to explore and no time to tinker with coffee brewing equipment. Each packet of instant coffee makes a single serving; therefore, you receive 10-12 cups of coffee from one box. Now add that to instant coffee’s lightweight nature, and you have the perfect coffee for backpacking hikers and light campers.

Here’s how to make instant coffee while camping:
It’s that simple!
Pros:
Cons:
Brewing a cowboy coffee is one of the, if not the easiest, ways to brew coffee. This brewing method was used by old cowboys during their many days and nights camping outside. And it was common to have a bunch of cowboys sitting around a campfire pouring coffee from their large cowboy coffee tins. Since there were no fancy pressing and filtering doodads to brew coffee, the cowboy method has been proven a convenient method for camping. Making cowboy coffee only requires grounds coffee, water, a coffee pot, and a fire. These few requirements make cowboy coffee a great fit for campers looking to travel light and brew their coffee.
You might be wondering, “Hey, what about filtering the brew?” Well, here’s the interesting hack about cowboy coffee. Cowboys would mix the brew with eggshells to make the grounds sink quicker onto the bottom. In addition to sinking the coffee grounds coffee and rendering filters redundant, the eggshells also help reduce the acidity. However, if you’re not comfortable with eggshells in your coffee, you can just substitute them with cold water.

Procedure:
Pros:
Cons:
The scoop top method is another neat little trick you can use when brewing a cowboy coffee. This method is great if you don’t want to ‘contaminate’ your cowboy coffee brew with cold water or eggshells.
The scoop top method is pretty straightforward, and you only need a scoop spoon or just about any spoon. Firstly, you brew the cowboy coffee using the above procedure until the fifth step. Then use a scoop spoon to skim off the coffee grounds from the surface.
Using a percolator is a popular coffee brewing method because it’s easy, quick, and produces a strong, flavorful coffee. A percolator requires no extra equipment, is lightweight, durable, easy to clean, and can brew enough coffee for large groups. Essentially, a percolator is an improved cowboy coffee brewing method.
Percolators usually come in large sizes that can serve up to 12 cups of coffee in one brew. Many people have found the GSI and Coletti percolators to be the best at brewing coffee for camping groups. These percolators can serve a minimum of eight cups of freshly brewed coffee at one go.
A percolator brews a robust coffee full of flavor. This rich flavor is due to the long and consistent boiling that ensures the grounds are finely brewed. However, the longevity and consistency of the boil can turn the coffee bitter if left to simmer longer than required. Fortunately, percolators come with a glass top button that you can use to monitor the color of your brew and prevent over brewing.

How to brew coffee with a percolator:
Pros:
Cons:
An outdoor drip coffee maker works just like the electrical one you’d have at home. The only difference is that the outdoor coffee maker has a metal bottom, allowing it to sit over a gas burner or stove. The drip coffee maker is easy to use and brews a flavorful coffee, especially with finely grounded coffee beans. The machine brews the coffee quickly, and you don’t need to keep a constant eye on the coffee. However, the entire coffee maker is big and bulky and, therefore, most suitable for campers with enough room in their wagon.

How to brew with a drip coffee maker:
Pros:
Cons:
Apart from instant coffee, making MacGyver coffee is the easiest camping coffee method on this list. The process of brewing MacGyver requires only two, sometimes just one, equipment that can fit in your pocket. You will only need a cheesecloth filter and a rubber band to make MacGyver coffee. That’s it! You can also use a custom-made filter that works the same way as the cheesecloth. Many people have found using a mesh filter like Primula a convenient replacement for the cheesecloth. This reusable mesh filter rests comfortably on many mugs and prevents any coffee grounds from ending up in your mouth. The mesh filter is easy to carry around.

How to brew MacGyver coffee:
Pros:
Cons:
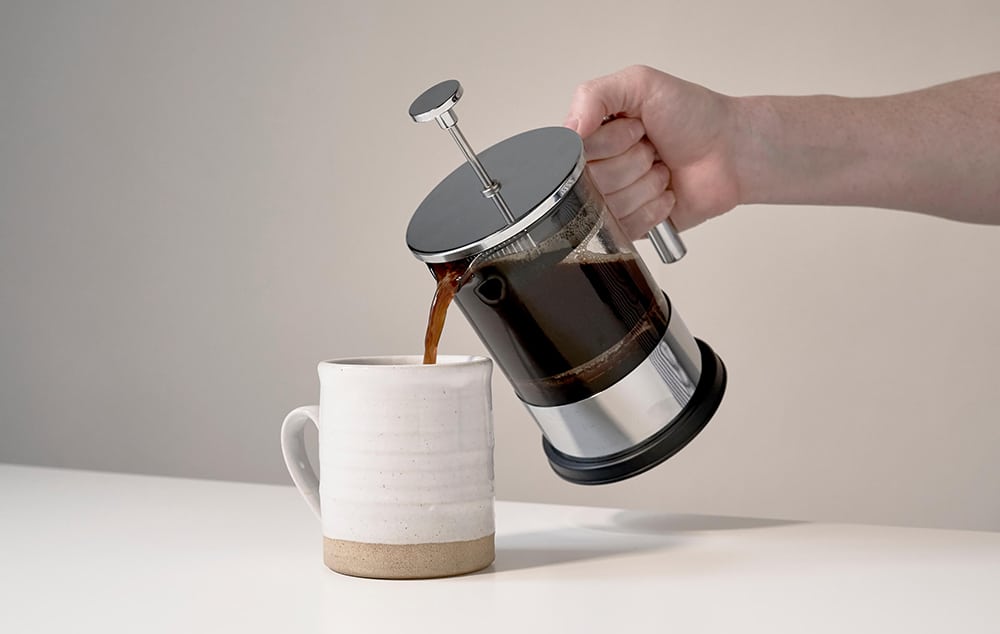
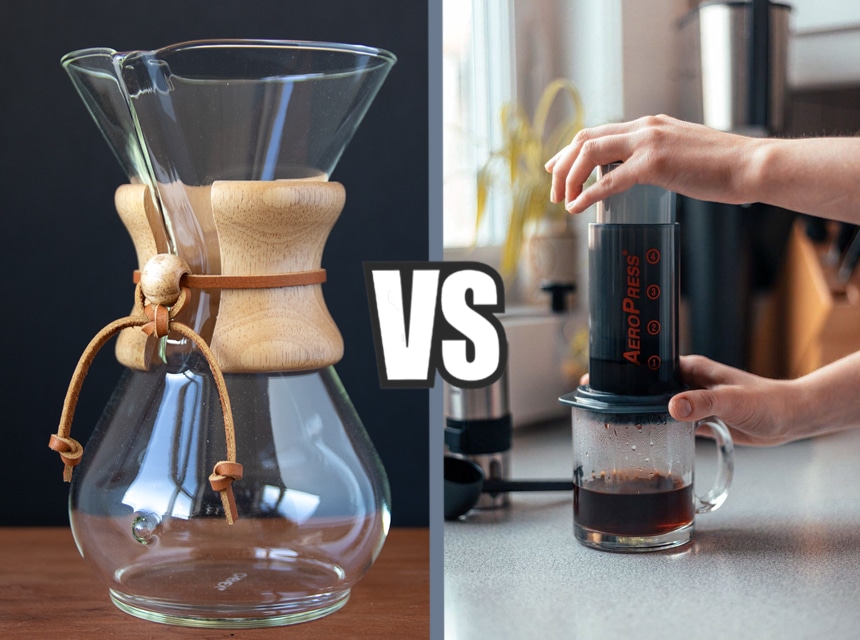
Who says you can’t have fancy french coffee as you sit around your camp watching the sunrise? The French press brews coffee of a higher body with well-mixed flavors. And brewing coffee with the french press is a more engaging method that requires a lot of patience. However, coffee made with a french press is cloudier because the wire mesh does not restrict finely grounded coffee as well as a paper filter. Standard french presses are not the best fit for campers because of the glass cylinder. This fragility is why most campers prefer metal french presses like the titanium Berstagot french press. Most camping french presses can also double as travel mugs, so you can start slurping your coffee as soon as you’re done brewing.

How to brew coffee with the French press:
Pros:
Cons:
Coffee bags are the way to go for light backpackers and campers who feel a little lazy to brew a cup of coffee. Coffee bags can be store-bought or homemade; either can make you decent coffee. However, we recommend homemade coffee bags because you get to grind the coffee beans the way you like them. Homemade coffee bags contain more caffeine than instant coffee and most store-bought. Making a coffee bag at home is simple, and all you need is a basket coffee filter and a string. Take a scoop of coffee grounds and place it in the middle of the spread-out filter. Then use the string to tie the filter closed. Remember to tie the knot slightly above the grounds coffee and leave a long enough string tail to hold. Coffee bags are easy to clean, take up little space, and are simple enough for anyone to brew a coffee.

How to brew:
Pros:
Cons:
Produces strong coffee than instant coffee, but it is less flavorful when compared to other brewing methods.
A single-serve filter coffee brew works much like the MacGyver coffee, but instead of cheesecloth and rubber band, you use a single-serve filter. The Primula filter we mentioned earlier is a great example of a single-serve filter. And there are many single-serve filters you can choose from, from mesh-wire, reusable paper filters to plastic filters. Single-serve filters are the most easily portable filters on this list. And if done right, they can brew a robust and well-mixed cup of coffee. A reusable single serve filter usually weighs less than six ounces, making it perfect for backpackers on the trail.

How to brew with a single-serve filter:
Pros:
Cons:
Silicone pour-over filters are great for campers and backpackers because they can collapse into flat discs. The silicone dripper also doesn’t retain coffee odors like paper filters or leak chemical materials into your brew. Not many coffee drinkers understand the importance of the materials they use in the pour-over method and how it affects the final product. Basically, the dripper material you use affects the brew temperature, which affects the extraction of coffee flavors. You need a material with a low thermal mass, which steals less heat from the extraction process. Silicone has low thermal mass and good thermal insulation, meaning it won’t quickly lose heat to the surroundings.

How to brew with silicone pour over:
Pros:
Cons:
A submersible filter cup method improves the coffee bag and pour-over drip methods. The coffee grounds are submerged in the coffee mug like a coffee bag, and hot water is poured like a pour-over drip. This reusable filter cup allows you to make coffee without wasting paper filters. The top of the filter cup has two tabs on each side to rest on top of your coffee mug. The filter canister hangs freely inside the coffee mug, allowing effective flavor extraction from the coffee grounds. The submersible filter cup is small, lightweight, and brews coffee in under five minutes, making it great for backpackers on the trail.

How to brew using a submersible filter cup:
Pros:
Cons:
The AeroPress is popular with many people worldwide because it can brew a flavorful cup of coffee in under two minutes. AeroPress is a pressurized immersion brewer that works the same way as an espresso machine. The difference comes in the source of the pressure. Unlike an espresso machine that uses pressure from a pump, the pressure in AeroPress is generated by human hands. Therefore, do not expect the coffee to turn out like a double shot espresso from Starbucks. Your hands just cannot generate that kind of pressure. Brewing coffee with an AeroPress is quicker than French Press because you use pressure to speed the extraction process. The AeroPress is easy to use, compact, and durable, perfect for making coffee while camping. Also, AeroPress’ paper filters are tiny and, therefore, less wasteful than paper filters in the pour-over method.

How to brew using the AeroPress:
Pros:
Cons:
The pour-over travel mug is an all-in-one travel mug for backpackers and hikers who like to enjoy their coffee while on the trail. A pour-over travel mug comes with a pour-over coffee filter made of stainless steel wire mesh that fits perfectly onto the travel mug. The pour-over drip process doesn’t require paper filters, and the mesh filter is easy to clean. A good pour-over travel mug should be vacuum insulated with a stainless-steel coating. Proper insulation allows hot coffee to retain heat for long and keeps iced coffee cold for hikers on scorching hot trails.

How to brew coffee on a pour-over travel mug:
Pros:
Cons
We have received tons of questions on how to brew different types of coffee while camping, and we’ve tried to answer them to the best of our knowledge.
Candidly, preparing iced coffee while camping is hard but not impossible. Iced tea requires ice, and finding ice cubes on a campsite in the middle of a wilderness is no easy task. The easiest way to get iced coffee while camping is to prepare it the night before or morning before embarking on your camping trip. Then you tightly seal the iced coffee in a well-insulated travel mug and toss it in the cooler. And if you have enough room, you could always bring a cool box and ice cubes in it. Then you can use the ice to make iced coffee. And if all else fails, you could always enjoy a cold brew instead.
This is totally possible in so many ways. If the problem is starting a campfire, maybe because you lack the supplies to make a fire, then a gas stove is your best bet. However, if there is a fire ban on your campsite, creative measures are needed. You can use a solar or electric heater to boil water for your coffee brew. Or you can use a battery-operated coffee maker to brew yourself a cup of hot coffee. You can also use a flameless cooker that uses heat packs to warm water to 203 degrees Fahrenheit.

Coffee grounds are biodegradable, but that doesn’t mean you should toss them behind a bush. The easiest way to dispose of coffee grounds is by throwing them out in a trash bin. Most dedicated campers are aware of the Leave No Trace principle that stipulates fundamental guidelines on how to treat nature and fellow campers. One of the fundamental guidelines is the proper disposal of waste. However, you can do more than properly dispose of coffee grounds. You can keep your coffee grounds and reuse them as a bug repellent. Additionally, you can recycle coffee grounds as compost, fertilizer, stains cleaner, or air purifier.
As shown in some of the above hacks, it is possible to make coffee without a coffee maker. Apart from the drip coffee maker, all the other described brewing methods do not require a coffee maker. However, since our list of hacks is not exhaustive, there are a few other coffee brewing methods you can explore. Other coffee brewing methods that can work well while camping include the use of strainers and Moka pot. The Cesve and Moka pot require meticulous brewing techniques that can sometimes be hard to pull off.

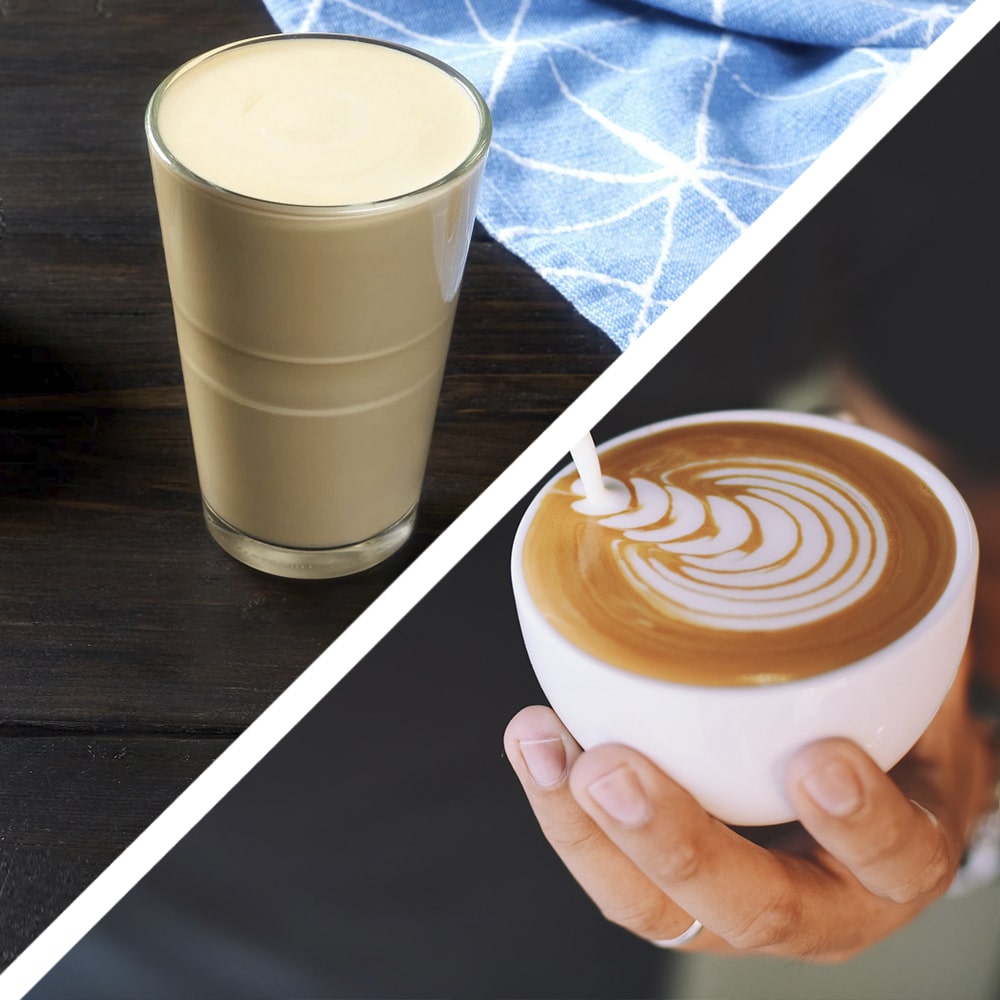
It is possible to make a latte while camping; you’ll need a few tips and extra pieces of equipment.
If you don’t have refrigeration while camping, make sure to use condensed milk or non-dairy creamer when brewing your latte. Just add boiling water to the condensed milk or non-dairy creamer, and you are good to go. Or you can just buy a one-touch latte at a store if you don’t want the extra weight and still need your morning latte fix.
Millions of people go camping every year, and some, if not most, are also coffee enthusiasts who need their daily caffeine fix. There is nothing wrong with enjoying a hot morning cup of coffee while watching the sunrise and listening to the sounds of nature. But however clever your brewing method is, you won’t fully enjoy the coffee without good-quality and well-ground coffee beans. The different brewing methods described in this guide can help you learn how to make coffee while camping. Don’t forget to take care when using fire to brew your coffee while camping. Make sure to completely put out any fire you might have started before leaving your campsite; remember the leave no trace principle.